In the ‘Setup’ menu (https://cloud.invantive.com/app/setup), Invantive Cloud provides the ‘Pre-authentication’ submenu with the following options:
- For on-premise use
- For support use
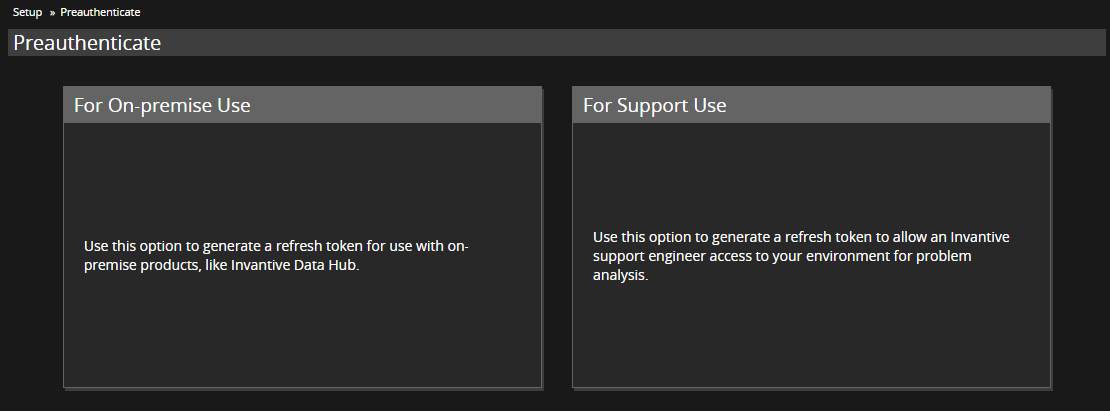
Manually generate access tokens, refresh tokens or OAuth authorisation codes
The on-premises usage variant is the most commonly used. This allows an authorisation code and, if necessary, an access token/refresh token to be requested for further use in another application or for creating a database with pre-authentication credentials. These are based on your own OAuth client ID, client secret and login details for the following packages:
- Atlassian Confluence
- Atlassian Jira
- Calendly
- Exact Online
- Fortnox
- GitHub
- GitLab
- Jira Service Desk
- Loket.nl
- PayPal
- PayPal test
- Teamleader Focus
- Teamleader Orbit
- Twinfield
- Visma.net Financials
- Zoom
The support use variant works similarly but uses Invantive’s own client IDs and client secrets.
Would you like to use your own client ID? Then always choose the ‘For On-premise Use’ variant.
Would you only like to make authorisation details available to Invantive for support purposes? Then choose the ‘For Support Use’ variant.
The rest of this article assumes the on-premises use variant. The support variant is virtually identical, except that it does not allow you to enter a client ID and/or client secret.
OAuth 2.0 Code Grant Flow
Pre-authentication uses the OAuth 2.0 Code Grant Flow. When going through the Code Grant Flow, you first enter the client ID and client secret, supplemented with any ‘scopes’ to indicate the scope.
After logging in to the cloud platform, you will receive an authorisation code. This authorisation code can be exchanged for an access token and, if necessary, a refresh token (depending on the platform).
The Implicit Grant Flow (for web pages) is not used.
More information about OAuth 2.0 can be found at:
Complete the Code Grant Flow
The example below outlines the steps required to obtain an access token and refresh token on Exact Online.
Important note! These steps are only necessary for specific applications typically used by system developers. Would you like to create a standard Exact Online link or Exact Online database? Then follow the steps at Connect Power BI to Exact Online.
Copy the client ID, client secret and redirect URL from the application registration on the platform (in this case Exact Online; it looks different for each platform):
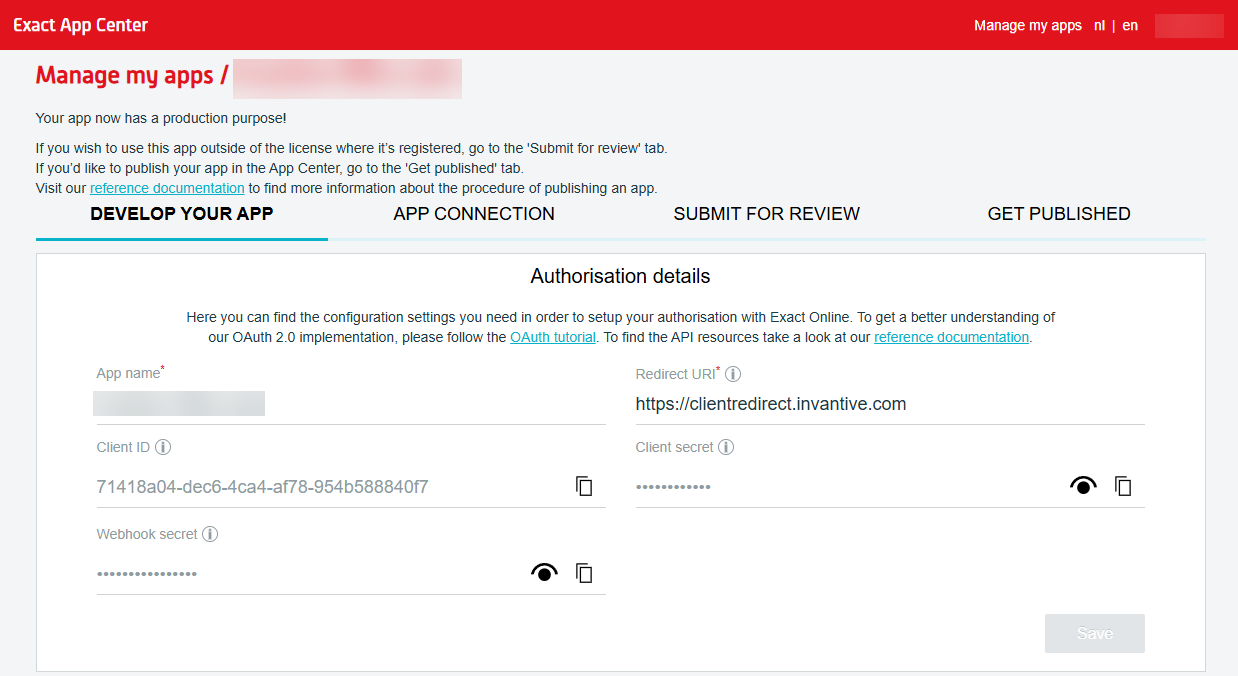
When entered into Invantive Cloud, it looks like this:
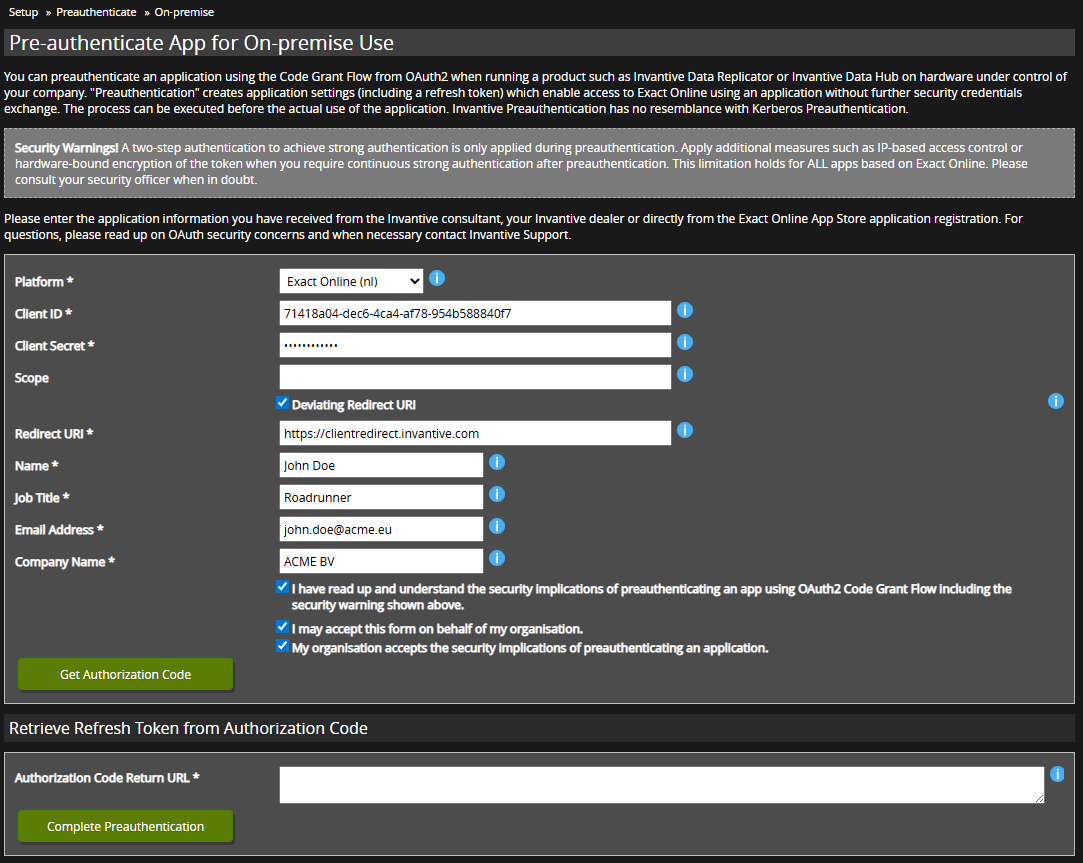
The redirect URL may differ from the one used for Invantive Cloud itself, so for example https://clientredirect.invantive.com is also acceptable, as long as it matches what is registered with the OAuth client application. Always check ‘Different Redirect URI’.
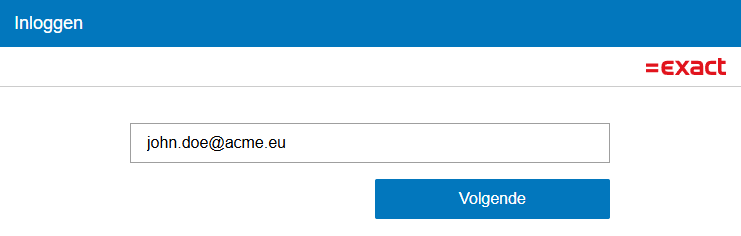
Select the ‘Get Authorisation Code’ button and authorise on Exact Online:
After authentication, copy the URL (a format similar to https://clientredirect.invantive.com/?code=stampNL001.... yWA&state=85c1f68a-937a-48f6-9ae1-653913a423f8) to the ‘Authorisation Code Return URL’ field in the original window:
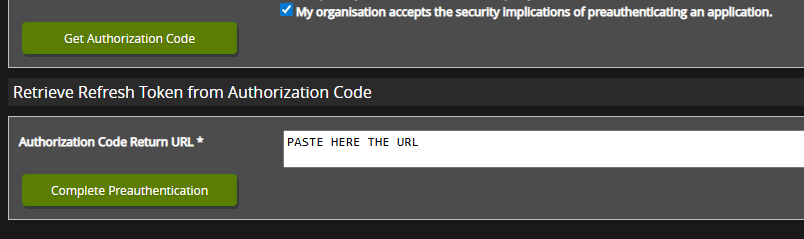
Select ‘Complete Pre-authentication’. The access token and refresh token will appear in the next window:
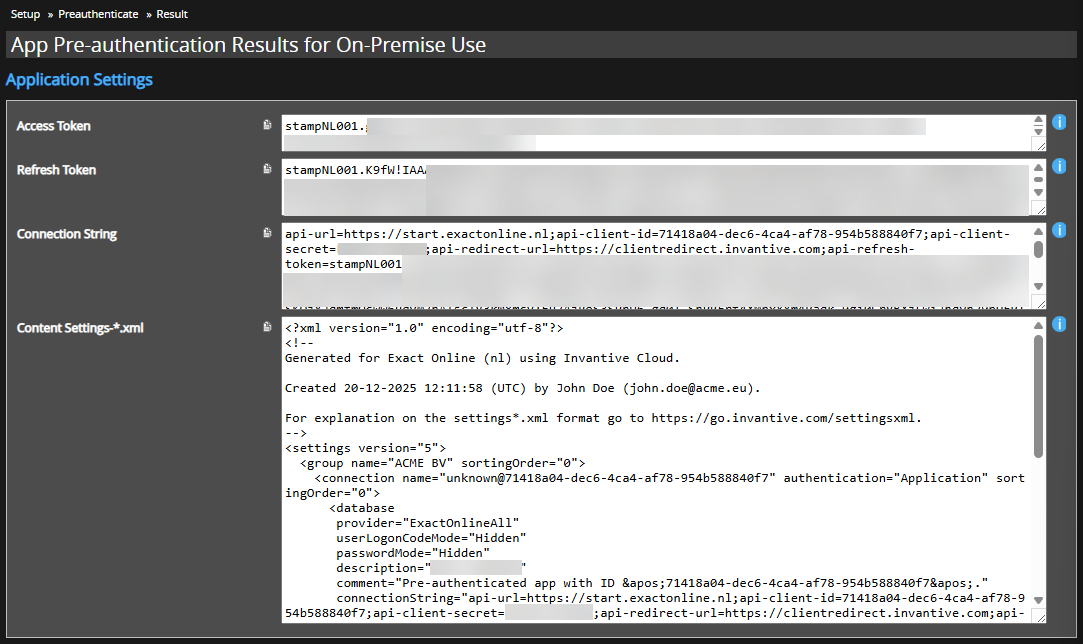
This window also contains a connection string for inclusion in settings*.xml files and a sample settings*.xml file.
The access token and refresh token can be used in Postman, for example, but also as pre-authenticated credentials for creating an Invantive Cloud database.