Invantive Control for Excel allows download of data from over 80 (cloud)platforms, but also allows real-time data maintenance to be done from within Excel. There are many ways built into Invantive Control to ensure the data maintenance meets standards for information security and quality. In this article a sample is given how to maintain a SQL Server database table using the Excel frontend.
Introduction
In today’s data-driven world, the ability to seamlessly interact with SQL Server data is paramount for finance professionals with a data specialization. Excel, with its familiar interface and powerful capabilities, emerges as a compelling user interface. In this guide, we’ll explore how Invantive Control for Excel empowers you to maintain SQL Server data effortlessly, ensuring data security and quality.
Compared to traditional Windows Forms applications or websites, using Excel as a user interface offers distinct advantages. First and foremost, Excel provides a familiar environment for finance professionals, reducing the learning curve and boosting productivity. It allows for quick data entry, manipulation, and analysis without the need for extensive coding or development efforts. Additionally, Excel’s versatility enables users to create custom reports and dashboards tailored to their specific needs, fostering data-driven decision-making. Moreover, Excel’s offline capabilities ensure data accessibility even in situations with limited or no internet connectivity. This combination of familiarity, flexibility, and offline access makes Excel a powerful choice for interacting with SQL Server data, particularly in finance-focused roles.
This article uses Invantive Control for Excel as a tool for real-time data integration between Excel and SQL Server. Alternatively, you can also use the exceltable functionality of Invantive’s UniversalSQL. For sample, please follow this link: Topics tagged exceltable. Finally, for downloading SQL Server, you can also use Power Query (see SQL Server Power Query-connector, 180 dagen gratis).
Preparations
Install Invantive Control for Excel
Install Invantive Control for Excel from https://download.invantive.com. The bundled license key to “Try all features” can be used for 180 days for free without further obligations.
Troubleshooting
In case the Invantive Control ribbon ever disappears, you can re-enable it as described in Excel no longer displays Invantive Control ribbon.
Database Definition
The first step is to register a SQL Server-database as a data container in a (virtual) database. Copy and paste the following XML-code in a file named settings-sample.xml in the %USERPROFILE%\Invantive folder (see How to find %USERPROFILE%\invantive):
<?xml version="1.0" encoding="UTF-8"?>
<settings
 xmlns:xsd="http://www.w3.org/2001/XMLSchema"
 xmlns:xsi="http://www.w3.org/2001/XMLSchema-instance"
 version="3"
 forcedefault="false"
>
  <group
   name="Sample"
   sortingOrder="0"
   shortDescription="Sample change database"
  >
    <connection name="Sample" forceNative="true">
      <database
       order="0"
       provider="SqlServer"
       connectionString="Server=mydatabase.database.windows.net"
      />
    </connection>
  </group>
</settings>
In this sample, a native connection is made to SQL Server. This switches the SQL-engine from Invantive’s UniversalSQL to SQL Server-syntax only. Additionally, the database can only contain a single data container; with a native connection it is not possible to add a data container like Odoo or Salesforce parallel to SQL Server.
You can also employ the Invantive UniversalSQL-engine following exactly the same steps, such as on Exact Online or Brevo.
Disable Secured Connections for Local SQL Server Instances
In this scenario, the database will always be addressed using a secured connection using certificates.
However, local SQL Server instances seldomly have a working setup for certificates. This may lead to an error such as:
provider: SSL Provider, error: 0 - The certificate chain was issued by an authority that is not trusted.
When connecting to a local SQL Server therefor change the connectionString by appending ;encrypt=False as described in Secure Data Connections for on-premises connections.
This changes the line with the connection string to:
connectionString="Server=mydatabase.database.windows.net;Encrypt=false"
Tables
Choose a table owner, preferrably authenticated using SQL Authentication instead of Windows Authentication.
Create a table in SQL Server using SQL Server Management Studio or alike. The table should contain some rows. For example, use the following SQL statements:
create table data
( id  uniqueidentifier default newid() primary key
, txt nvarchar(30)
)

insert into data (txt) values ( 'hello world')

insert into data (txt) values ( 'acme')
Create a Model
Now start Microsoft Excel, create an empty workbook, and execute the steps below.
Authentication
After placing the file in %USERPROFILE%\Invantive, the connection window of Invantive Control for Excel will show the “Sample” group.
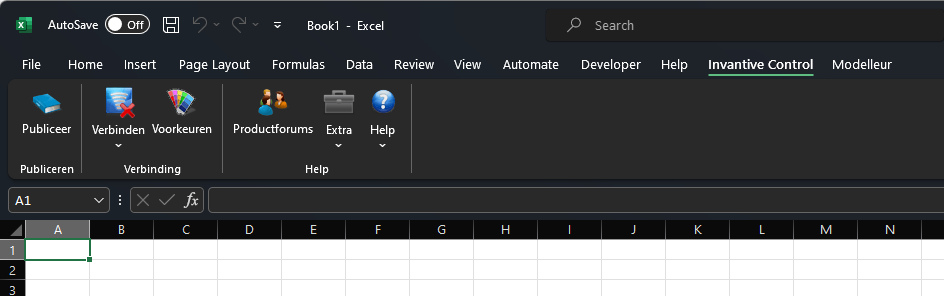
In the Invantive Control-ribbon click on “Connect”:
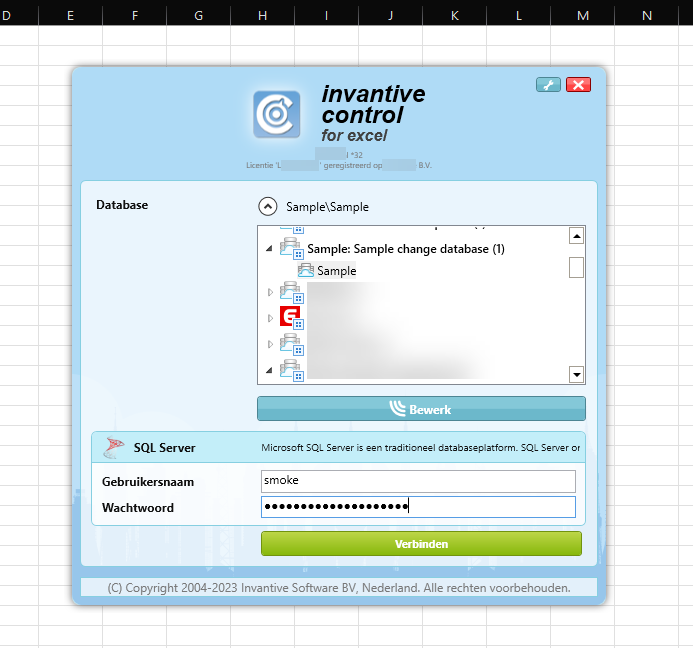
Select the Sample-database in the Sample-group and enter the credentials of the user, and choose “Connect”:
The connection will be established.
Add Repository
Since the (empty) workbook has no predefined repository included, a question will be asked as below:

Select “Yes”.
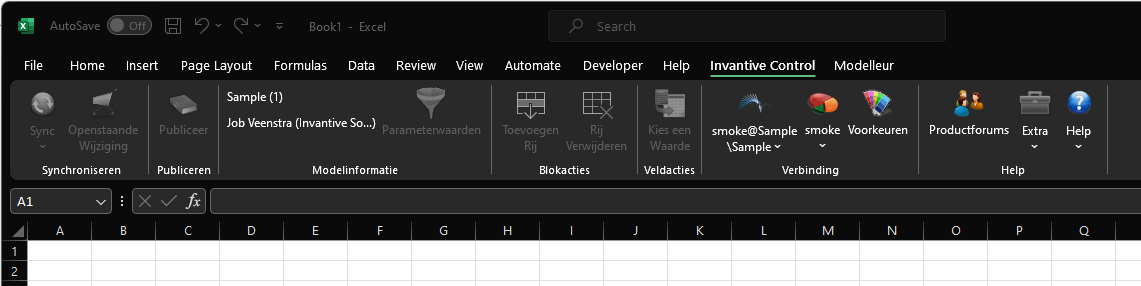
The ribbon now changes to include more buttons:
Define User Entry Block with Data
The next step is to define a block of data somewhere in the Excel workbook, where the user can download, change and upload data.
Go to the Modeller ribbon:
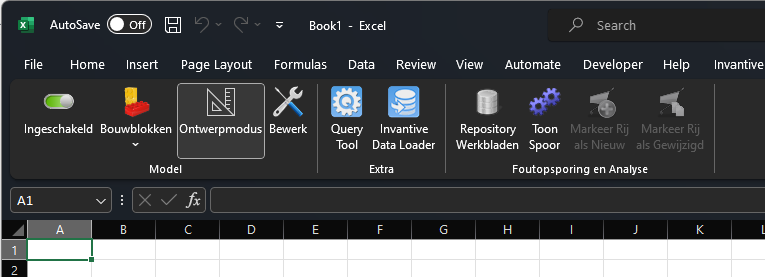
Check that “Design Mode” is enabled. When design mode is enabled, the “Edit” button is available as in the picture above.
Choose the “Edit” button.
A window appears:
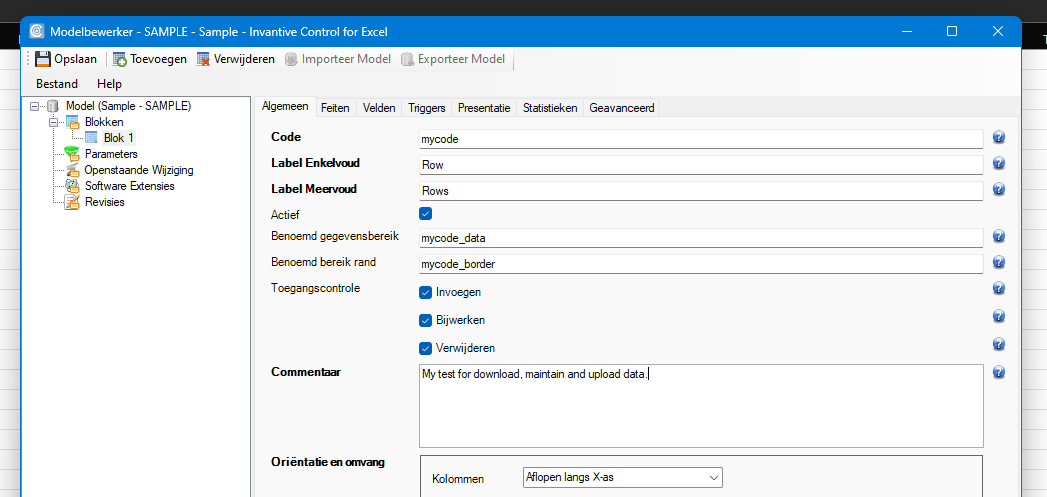
Go to “Blocks” and choose “Add”:
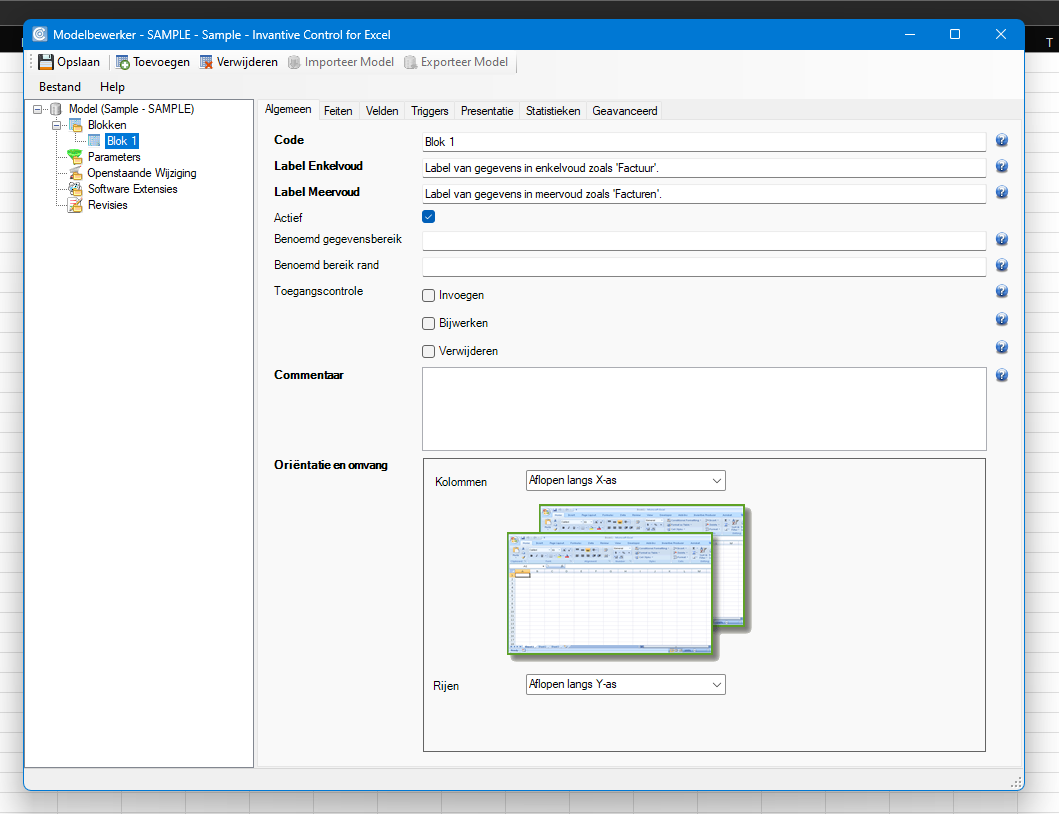
Optionally assign a code, labels and named ranges. The named ranges are typically named after the code plus “_data” and “_border” respectively for the named range for the data as named range for the data plus border. The named ranges - when set - are automatically managed to always have the correct size and enable Excel-formulas to refer to the exact data block.
Check the access control to include insert, update and delete:
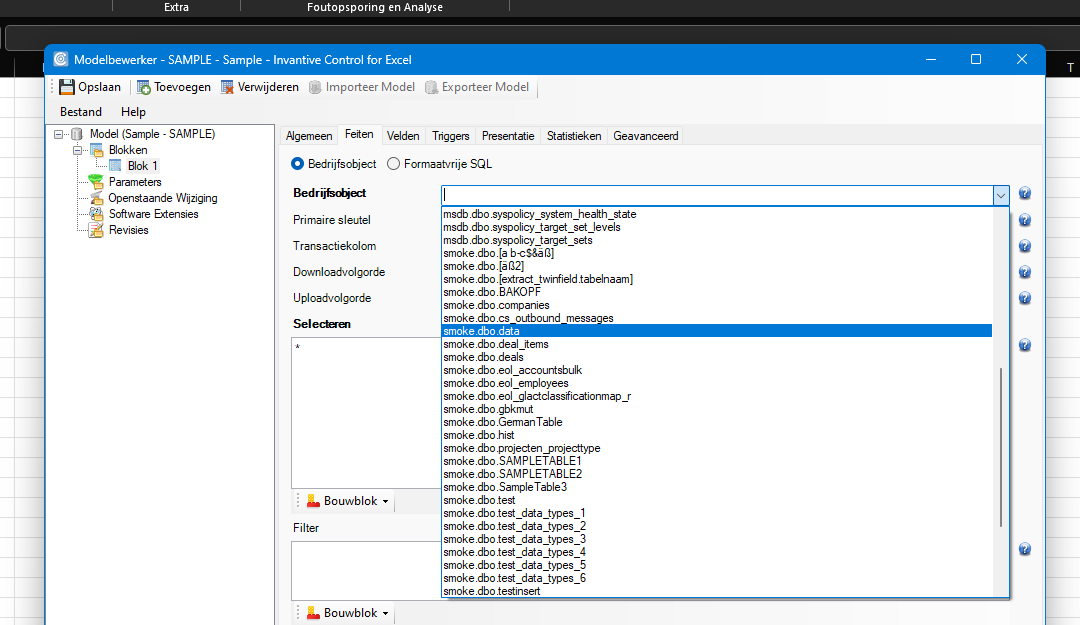
Now let’s define what table is to be maintained. Go to the “Facts” tab:
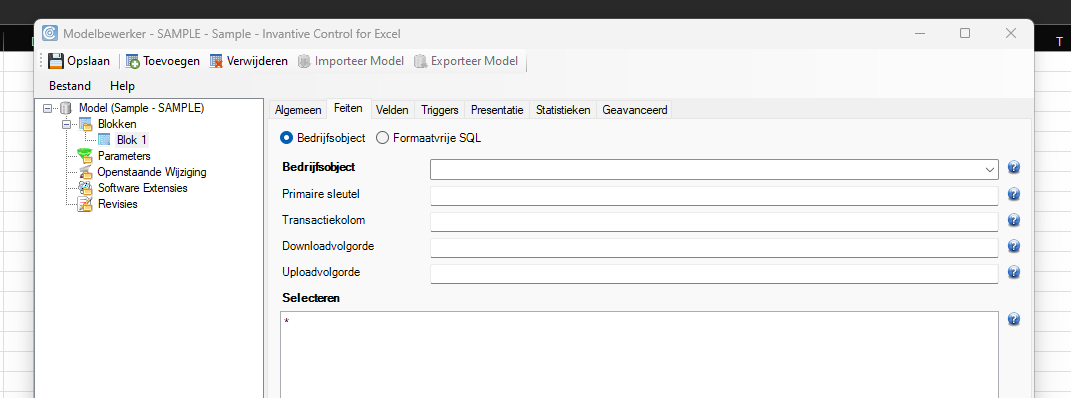
Free-format SQL is typically used for download-only purposes and does not allow maintaining data. For easy maintenance and upload the business object must be specified instead.
Choose the desired table, in this case smoke.dbo.data:
Then enter the (unique) primary key column, in this case id:
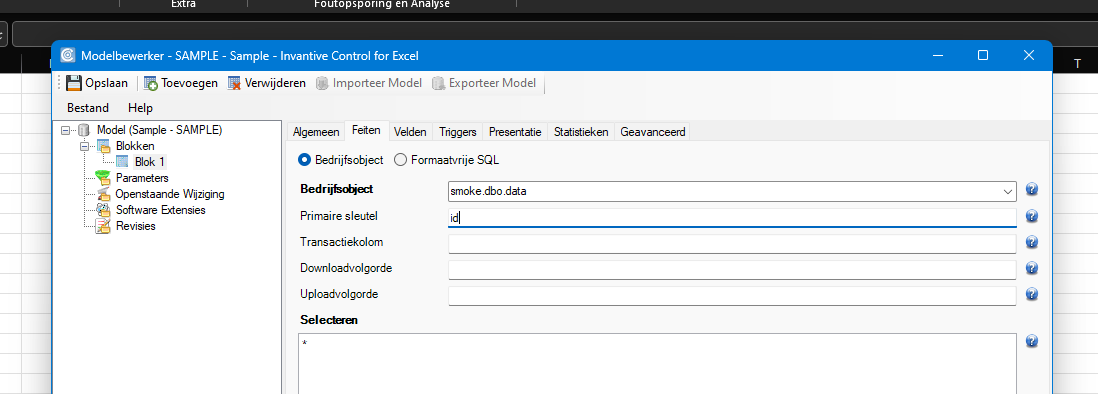
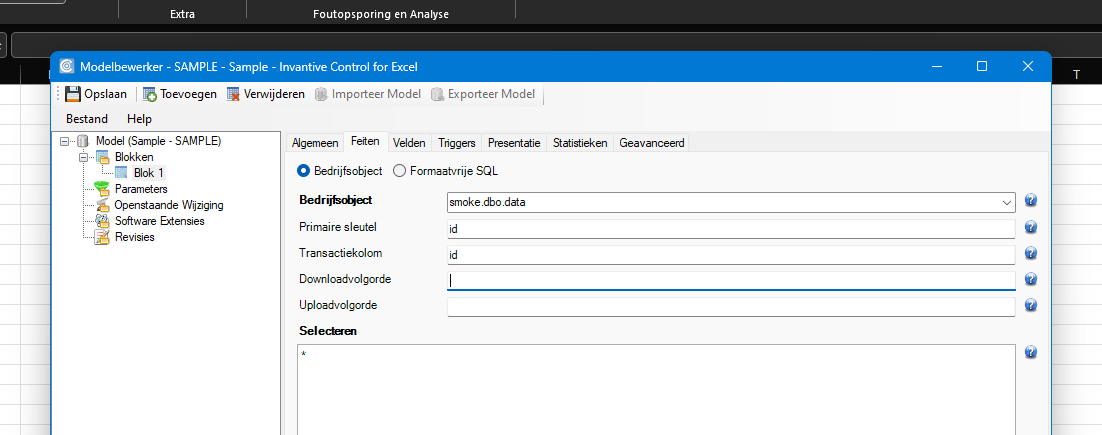
Invantive Control for Excel uses optimistic locking to allow multiple users to change rows within the same table in parallel, even when disconnected from the network. The value of transaction column is used to detect that a row was changed by another user between download and upload of changed data.
In case you data model has a column that always changes value when a user change the row: enter that column name as transaction column. This is typically a numeric (incremental) counter or a date modified field.
When there is no transaction column, just use the primary key column. This however disables detection of concurrent updates of the same row in a multi-user environment.
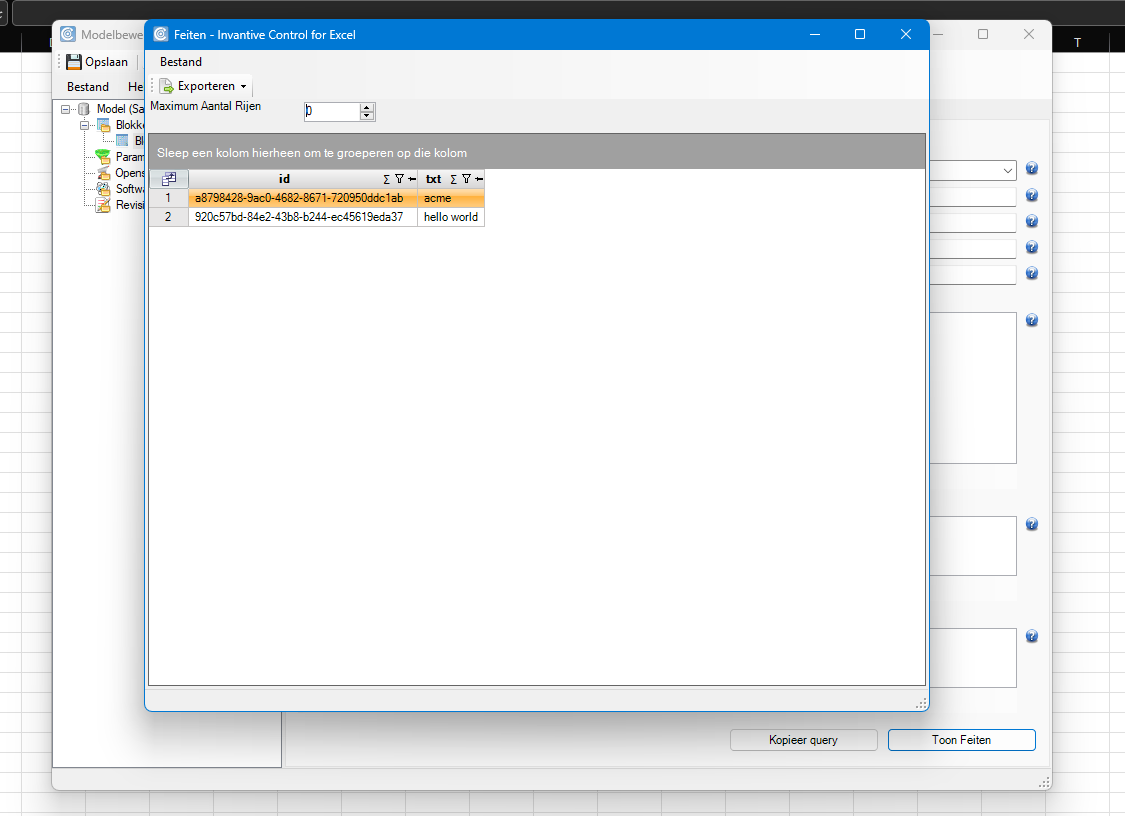
Check that the table contents can be retrieved and match your expectation by selecting the “Show Facts” button:
Presentation of Data Block
Next step is to specify where the block should be located in the Excel workbook.
Go to the tab “Presentation”:
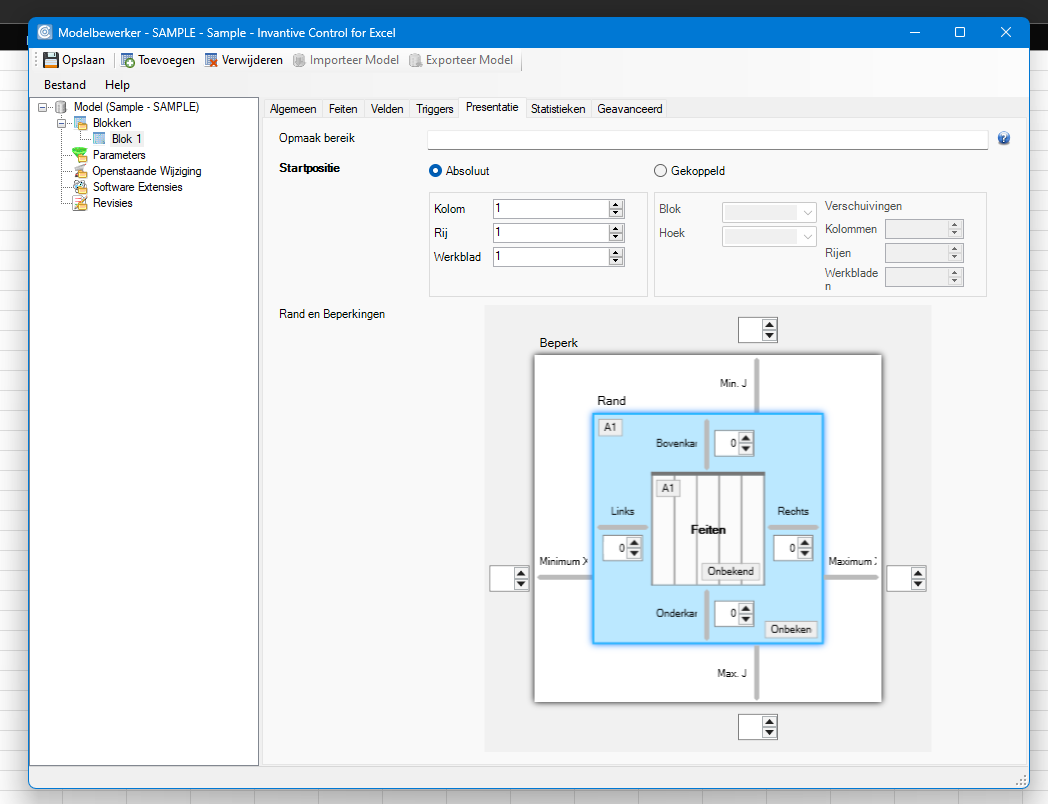
The block will be located on the first worksheet (already set), starting at column 1 and row 1 (cel A1).
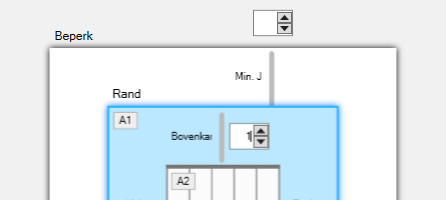
The block will have a header row with a height of 1. Change the height from 0 to 1:
For this sample, no fancy layout will be applied to the data rows downloaded.
Choose “Save” and close the model editor.
Leave “Design Mode” by selecting the button.
Save the workbook as sample.xlsx.
Initial Data Download
Next step is to download the existing data rows from the SQL Server database.
Go to the Invantive Control ribbon and choose “Sync”:
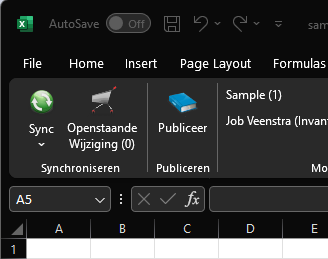
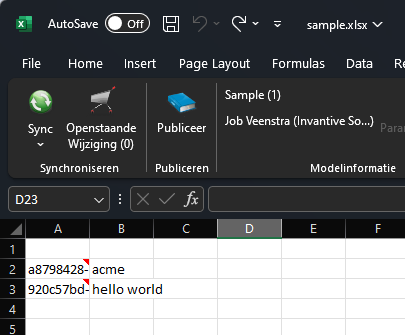
After a few seconds, the data is shown in the worksheet, starting at row 2:
Remember we have left space for a header row in the model.
Add now some heading like ‘ID’ and ‘Text’, and resize the columns:
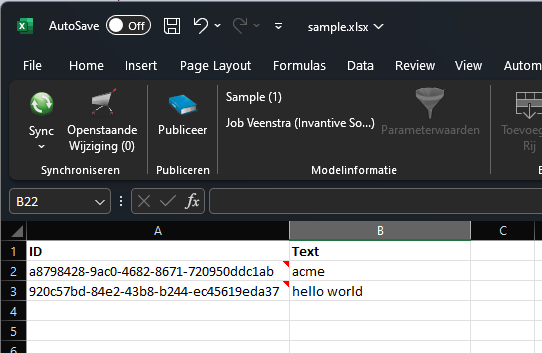
Please take note of the red triangle in the upper-right corner of the ID-column. This triangle is an Excel comment attached to the first column included. It contains the value of the ID and transaction column of this row, since they don’t have to be included in the block of data. You can visually validate this by hovering over the red triangle:
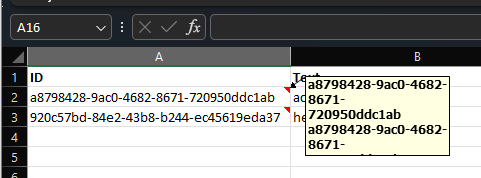
In this case, the values are identical since the primary key and transaction column are both id.
Change Data
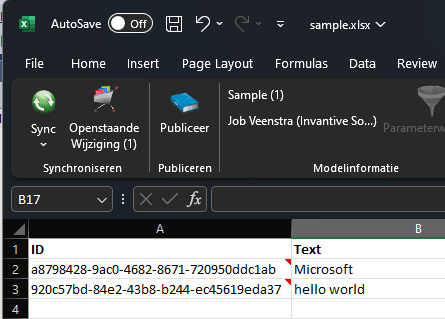
The next step is to change and add some data which must be uploaded into the Microsoft SQL Server-database later.
First change “acme” to “Microsoft”.
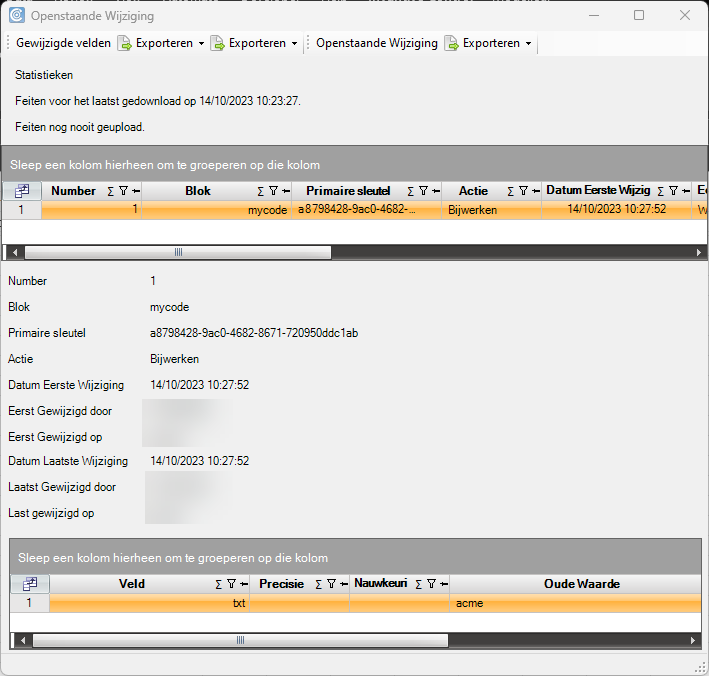
The cart of the ribbon suddenly changes to carry a load and shows 1 pending change:
Full details are available by selecting the button:
Add Row of Data
Adding a row is also simple. Place the focus on a row in the block. The button “Add Row” becomes available:
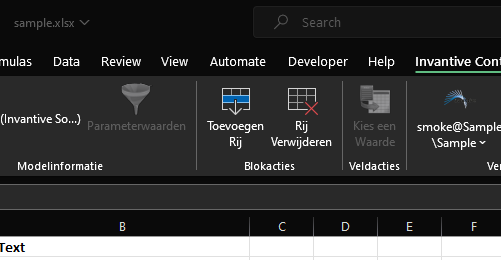
Choose the button “Add Row” and fill in a value for “Text”.

Note the value of pending changes going from 1 to 2.
In the repository you can specify that some columns are changeable and others not, as well as more complex validations. In this case, the ID can be changed, but it is recommended to leave it empty since it is defaulted to a new ID by SQL Server upon insert.
Upload Changes
The final step is to upload the new row and the changed contents of the SQL Server table to SQL Server directly from within Microsoft Excel.
Choose the button “Sync” again:

After a few seconds, the synchronization is finished. The new and altered rows have been registered in SQL Server, and the new contents of the SQL Server have been downloaded into Excel. This will also include changes by other concurrently active users.
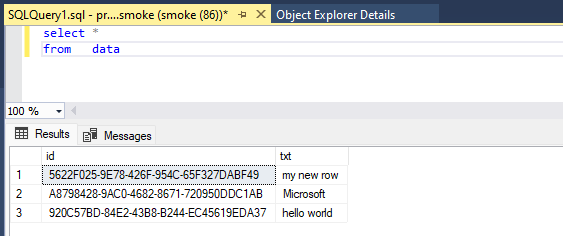
The new contents of the table can also be seen in SQL Server Management Studio:
Troubleshooting
In case you run into any issues, please add a reply below or create a new topic. You might also benefit from the free hour personal getting-started session that can be reserved online.
Conclusion
In this comprehensive guide, we’ve explored the seamless integration of Excel as a user interface for maintaining SQL Server data through Invantive Control for Excel. For finance professionals with data specialization, this approach offers a host of advantages. It leverages Excel’s familiar environment, empowering users to efficiently manage, manipulate, and analyze data without the complexity of traditional applications. The ability to create custom reports and dashboards enhances data-driven decision-making, while Excel’s offline capabilities ensure accessibility in diverse scenarios. By bridging the gap between SQL Server databases and Excel, Invantive Control for Excel simplifies data management, ensuring security and quality. Embrace this powerful tool to elevate your data management capabilities and excel in the world of finance.