The instructions are now also available on the Invantive Cloud site at https://cloud.invantive.com/en/exactonline/power-bi-connector/setup.
This page gives you instructions on the configuration and use of Invantive Bridge Online of a previously defined Invantive Cloud database.
The instructions apply for the Free Plan and Invantive Office subscriptions.
When you don’t yet have a pre-defined database on Invantive Cloud: please follow these steps.
A video is available on creating a database and loading the data into Power BI:
Purpose
Invantive Bridge Online enables one-click retrieval of information from many cloud and database platforms into Power BI and Excel (Power Query). The product uses the standard OData4 protocols of Power BI and Power Query, so no additional drivers are needed and the reports also work using Power BI for the web.
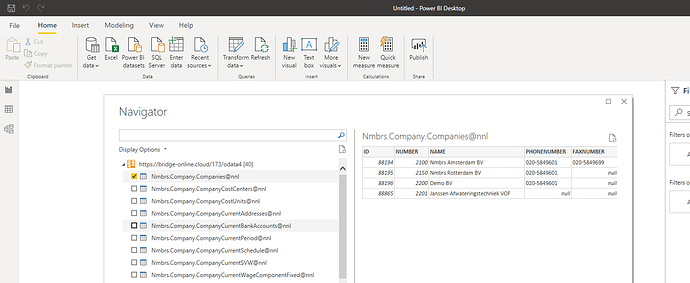
An example using Power BI with Nmbrs:
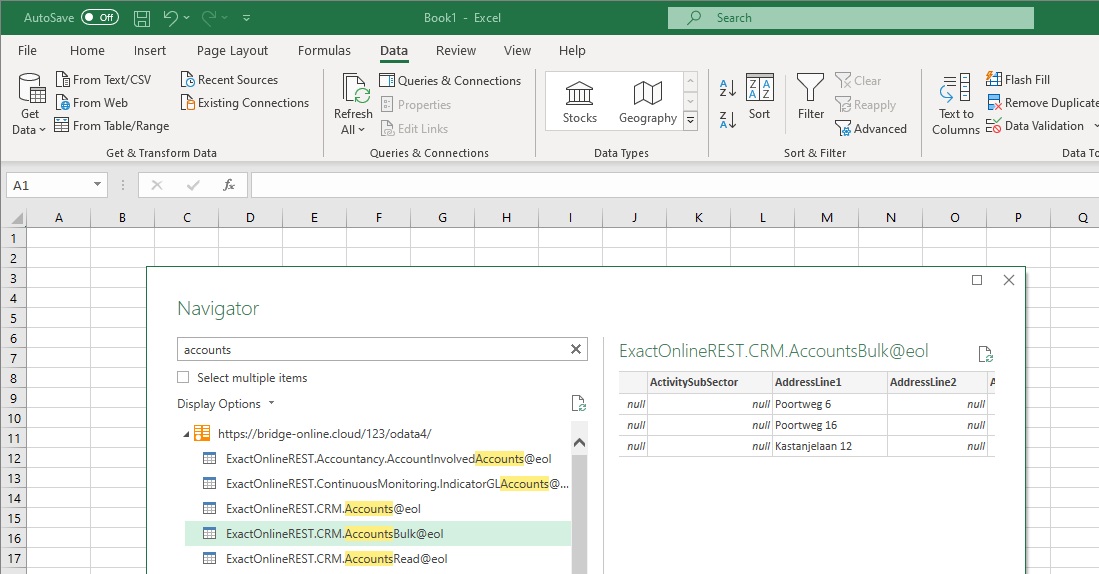
An example using Power Query with Exact Online:
Invantive Bridge runs on Invantive SQL, an enterprise-grade solution for high-volume and high-throughput access of cloud and on-premise data containers.
Configuration
To configure your own environment:
- Make sure you have defined a database following steps as on Register your first Database on Invantive Cloud.
- Make sure your IP-address is configured to allow to the database through Bridge Online.
- Set up credentials for use with the OData driver of Power BI, Power Query and/or Access OData.
Allow Access from your IP-address
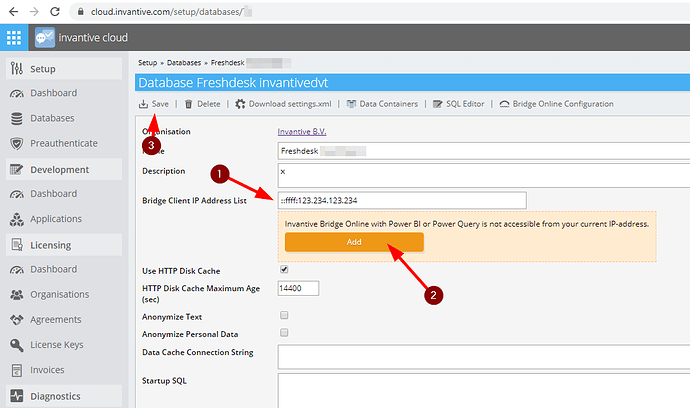
Please execute the following steps to allow access from your IP-address as shown in the picture below:
- Navigate to the database on Invantive Cloud.
- Check that your current IP-address is listed with ‘Bridge Client IP Address List’ (red 1).
- If not, an orange button will appear allowing you to add the IP-address.
- Select the button (red 2) if available.
- Press the Save button (red 3).
Allow Use from any IP-address Location
Specify asterisk (“*”) to allow use from your database from any location in any country covered by Invantive services. Ensure beforehand that your information security policy allows that the data made available through the Invantive Cloud database without IP-address based filtering.
More fine-grained security settings are recommended as described in Fix itgenboe031 and itgenboe030 error on Power BI Refresh (Bridge Online access is not authorized from IP address ...).
Set up OData Credentials
A separate set of credentials are used to retrieve data using OData from Power BI and Power Query, in combination with IP-address validation. These credentials are shared across all downloads using OData of a user.
Please execute the following steps to configure the credentials:
- Navigate to the database from Invantive Cloud databases.
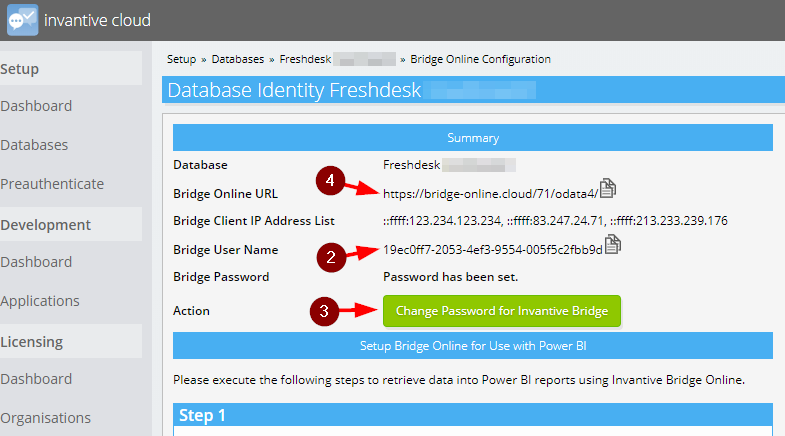
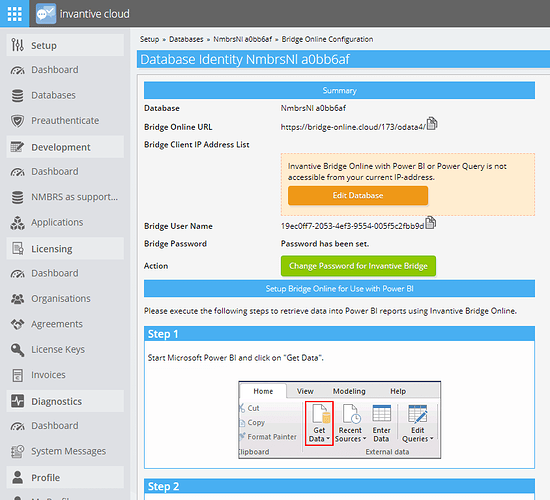
- Select the “Bridge Online Configuration“ button (red 1).
- A screen similar to the following appears:
- The user name is a fixed value consisting of random characters (red 2).
- Set the password using the hyperlink (red 3).
- The OData URL to download data with into Power BI and Power Query is listed for your convenience (red 4).
Power BI Use
The use with Power BI is described online below the configuration settings in the Bridge Online Configuration page in a number of steps as shown below:
Power Query Use with Excel on Windows
Please execute the following steps for use with Power Query:
- Install a recent version of Excel: Excel 2016, Excel 2019 or Excel 365.
- Start Excel.
- Select Get Data from the Data ribbon.
- Select OData:
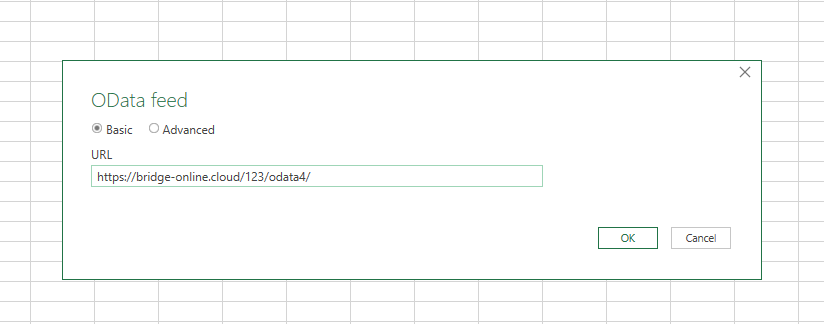
- Enter the URL you have received and press OK:
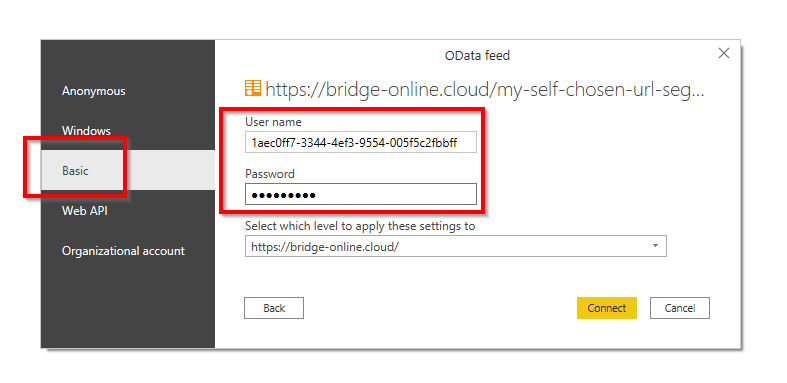
- When the credentials have not been memorized by Power BI/Power Query, you can enter them.
- First choose “Basic“ on the left tab, then enter the credentials:
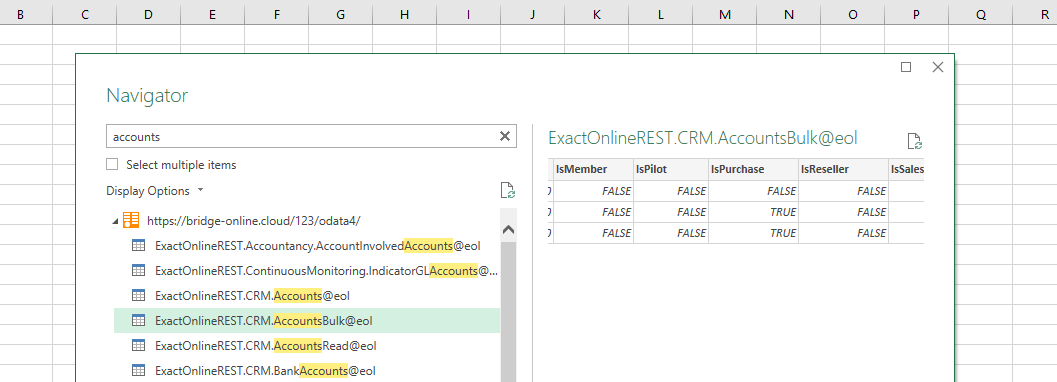
- Select a table such as “AccountsBulk” which contains all customers (Exact Online only):
- Select the button ‘Load’.
- Note that an alias may be present at the end of your table names, like ‘@eol’.
- Note that an initial load can take minutes or longer on large environments to retrieve and download into Power BI. To illustrate, the retrieval of 50.000 customers can easily exceed 50 MB.
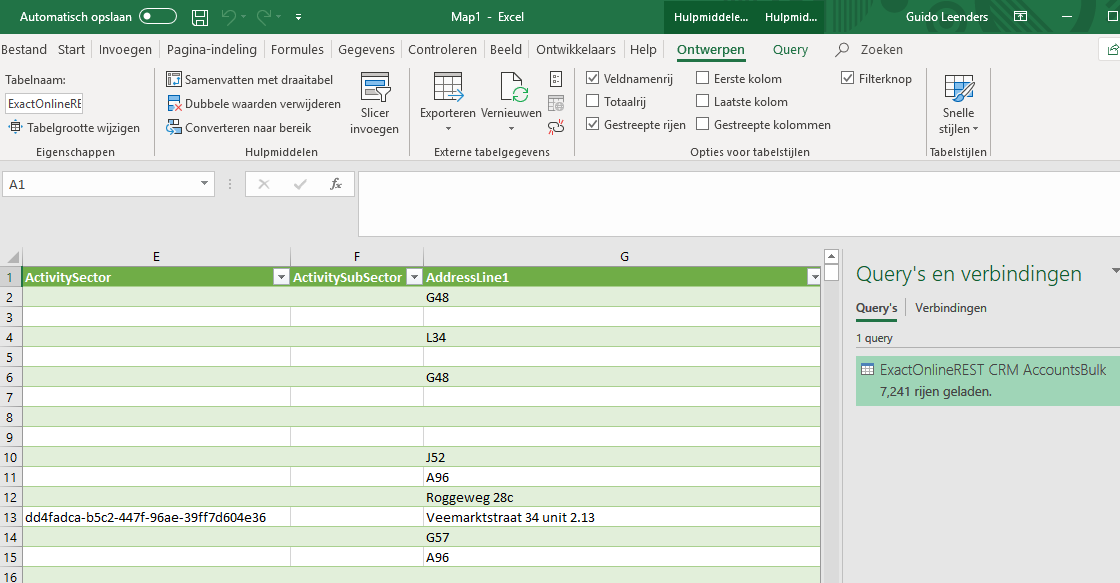
- The data shows in Excel:
- Excel automatically assigns an Excel table name (red 6):
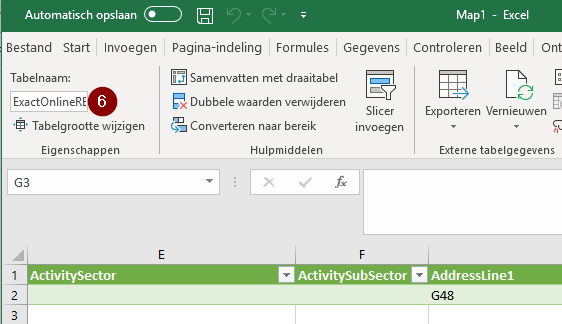
- To analyse your data just create a pivot table in the Insert ribbon (red 7):
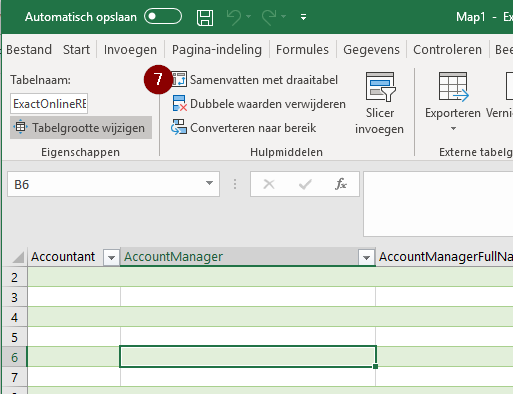
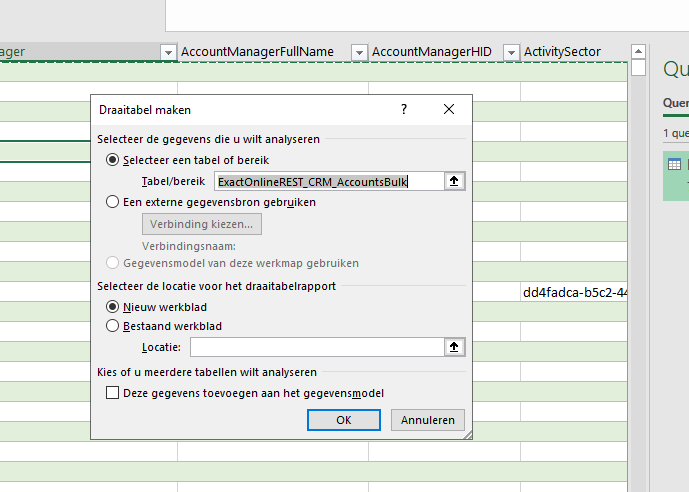
- Excel shows the default pivot table creation window:
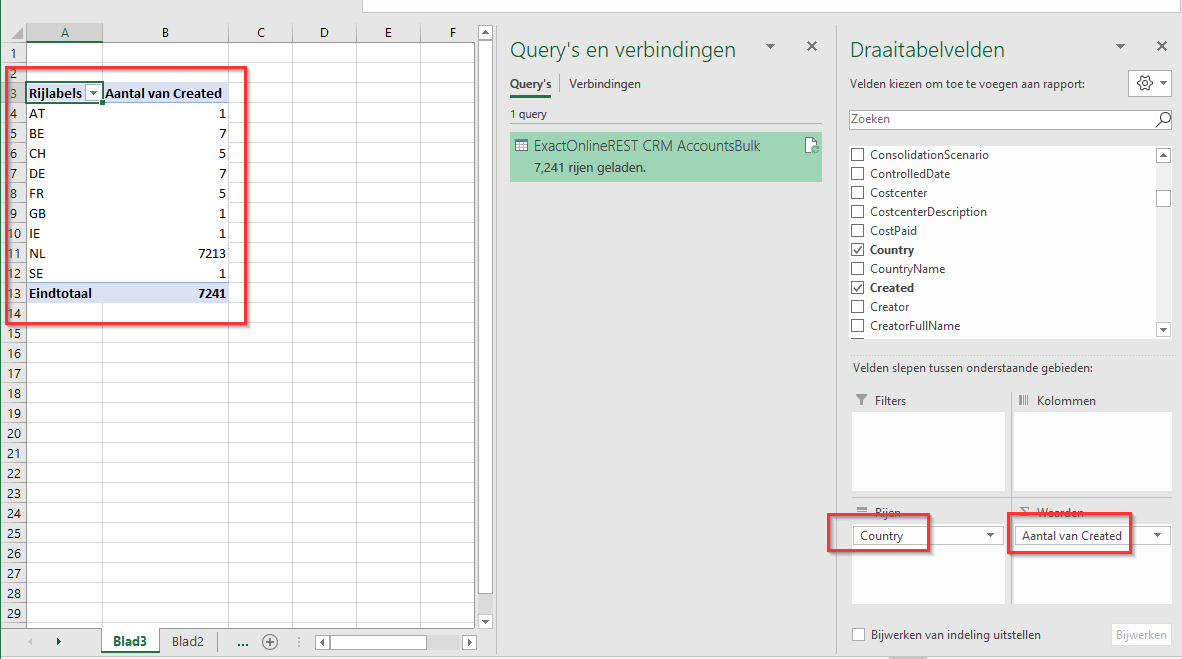
- Drag Country to Rows and Created to Values in the pivot table to get the number of accounts per country:

