This article explains how to make reports on Microsoft Power BI Desktop independent of their environment by using parameters in Power BI.
This process will be illustrated by two samples:
- Create/update a Power BI report independent of the Invantive Bridge Online database URL to allow easy distribution as a template.
- Create/update a Power BI report for accountants which allows configuration of the Exact Online company to report on.
Report independent of Database URL
Different Bridge Online Versions and Databases
Invantive Bridge Online can provide many database to a Power BI user to access cloud-based data source such as Salesforce, Visma.net, Exact Online or Teamleader. However, each user may have a different database and different URL pointing to the database. For example, one user may use the Exact Online database at:
While another one uses in Power BI Desktop the URL:
And an independent consultant might want to create a report to distribute among it’s customers. The consultant executes the following steps:
- Creates the Power BI dashboard using the “my-dummy-data” URL.
- Export the dashboard to a Power BI template.
- Send the report to the customers, which accesses the same data using a different URL.
Report Independent of Precise URL
Power BI-templates allow you to create reports that run across all available Invantive Bridge Online databases.
As with all knowledge base articles, these instructions require relevant knowledge to be interpreted and most efficiently applied. Relevant trainings are available from many Invantive and Microsoft dealers. For instance, reports involving multiple databases may require multiple parameters.
Instead of training, you may want to book a short consult from Invantive (charges apply).
The following steps provide you with steps to follow when creating and/or maintaining a Power BI report using Power BI Desktop.
Define Parameter to Hold URL
First define at least one Power BI parameter as follows:
- Start Microsoft Power BI.
- Close the splash screen.
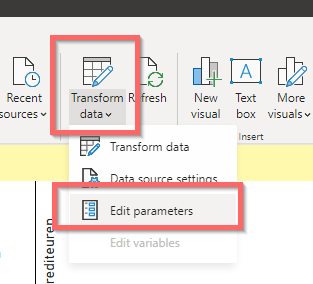
- Click on the “Transform Data” button (or “Edit Queries” depending on Power BI version).
- Click on the “Manage Parameters“ button.
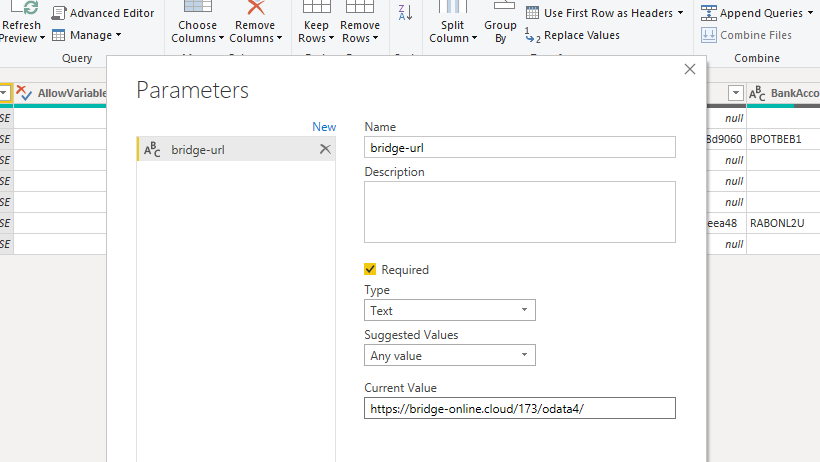
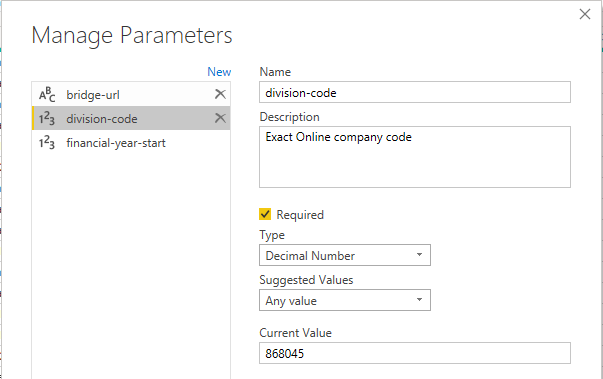
- In the Manage Parameters window click on the “New” button.
- Enter an applicable parameter name. For most use cases, the name
bridge-urlwill suffice. - Optionally specify the type “Text“.
- Optionally provide a meaningful default parameter value, such as “https://bridge-online.cloud/173/odata4/“.
- The end result looks like:
- Click on the “OK“ button.
- The Power Query Editor looks like this:
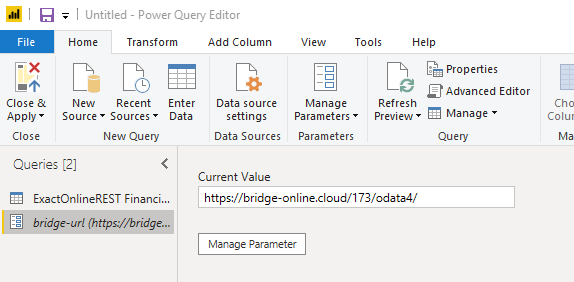
- Click on the “Close & Apply“ button.
Geavanceerde Editor
In de geavanceerde editor ziet het gebruik van een Power BI parameter X er als volgt uit:
laat
    Bron = OData.Feed(X, null, [Implementation="2.0", ODataVersion=4, OmitValues=ODataOmitValues.Nulls, Headers=[Referer = "change-your-unique-id-for-the-source" ], Timeout=#duration(0,2,0,0)]),
Add New Data Set
When adding a new data set, you can use the new introduced parameter ``bridge-url`:
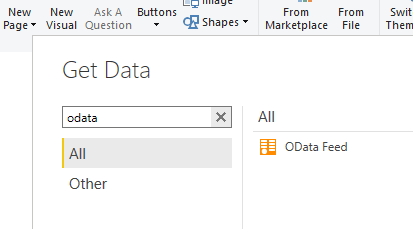
- Click on the “Get Data“ button.
- Select the OData Feed source:
- Click on the “Connect“ button.
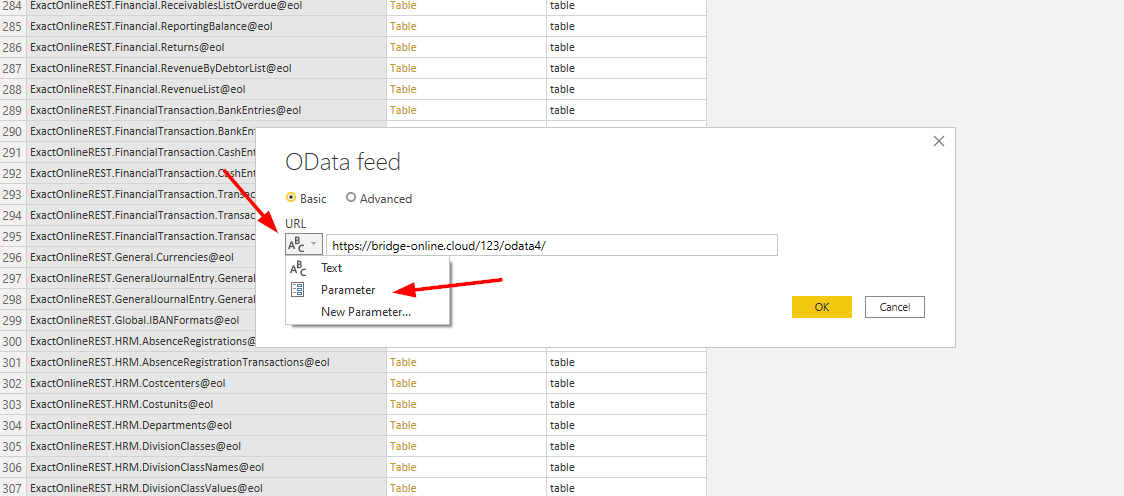
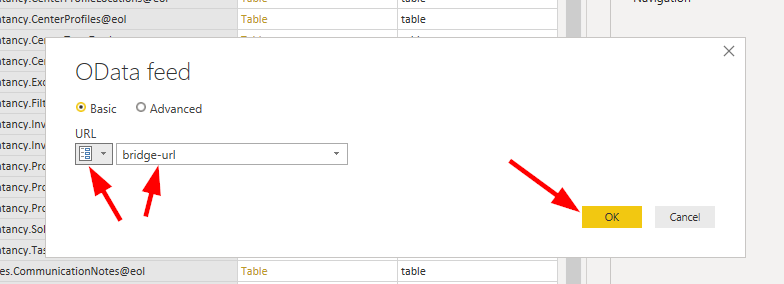
- A window appear with a drop down in front of the URL:
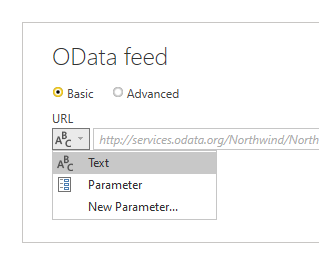
- Choose “Parameter” instead of “Text“.
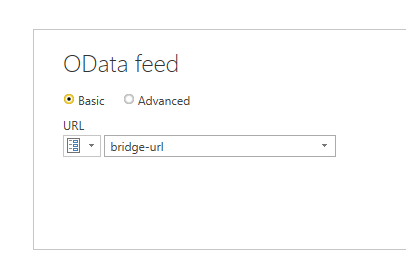
- Select your new parameter when not auto-selected by Power BI Desktop:
- Power BI will auto-select a parameter when there is solely one with the right data type.
- Click on the “OK“ button.
- Follow the normal process for entering credentials.
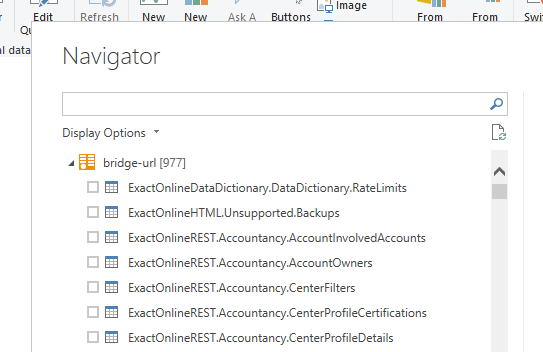
- The list of available tables is presented:
- Choose some tables to load.
- When you change the URL defined by the parameter into a different value and refresh the report, all data will be taken from another database.
- Test your changes.
Modify Existing Data Set
To make an existing data set independent of the database URL, you can use the new parameter as defined above:
- Open the report.
- Go to the Power BI Query Editor.
- Select the table.
- Select the gear symbol next to the “Source” step as shown:
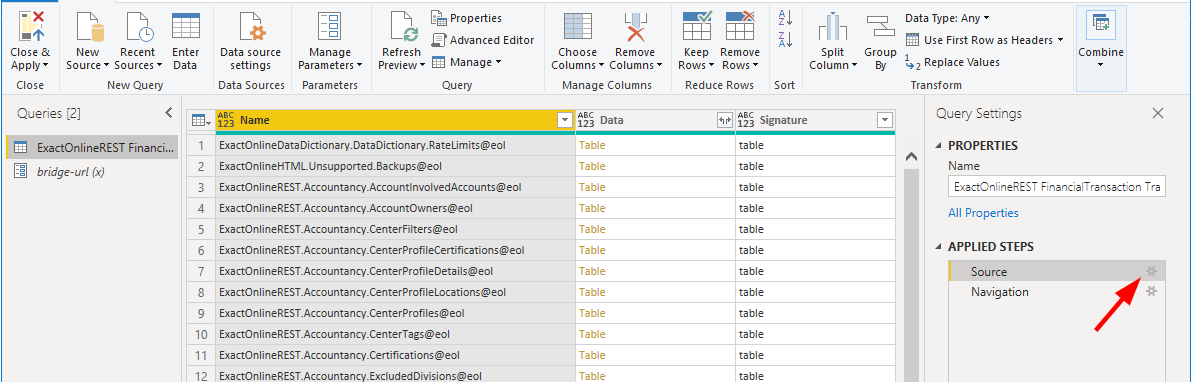
- When there is no drop down list shown to change the URL from “Text” to “Parameter”, you need to define the parameter first.
- Change the source as shown to the parameter:
- Select the parameter as shown:
- Close the Query Editor.
- Test the report.
When changing data sources through the user interface is sluggish, you might want to just replace the OData.Feed line of text in the Advanced Editor:
Bron = OData.Feed(#“bridge-url”, null, [Implementation=“2.0”]),
The query editor even provides syntax highlighting and autocompletion.
Select Exact Online company to report on
Often an accountant will process financial data from a wide range of companies. A flexible Power BI report should make it use to select a specific Exact Online company to import data for.
Add Exact Online company selector
Proceed as follows:
- First define a new parameter named
division-code:
- Optionally specify a list of values using the
SystemDivisions@eol. The Exact Online companies will then be shown in a drop down list. - Assign the parameter the division code of a company.
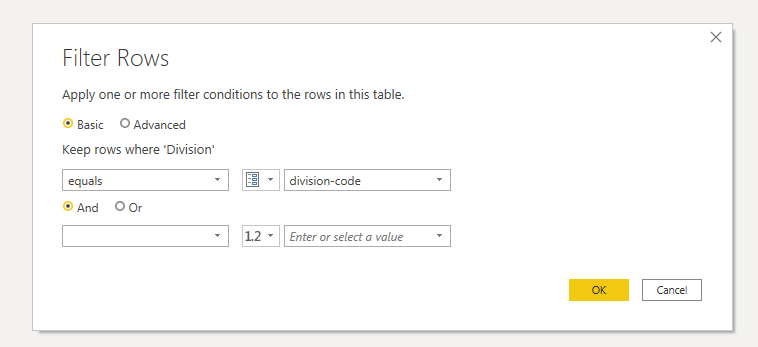
- Add a filter step on every data source to solely include the data from the select division code, immediately after the download so that PowerBI’s query-folding can pass on the filter:
Use the Exact Online company selector
Use of the Exact Online company selector based on the parameter is quite easy:
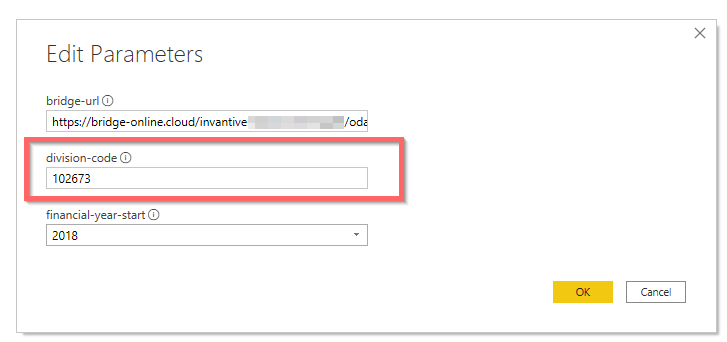
- In Power BI go to the “Edit parameters”:
- Change to the division code of the company used:
- Refresh.